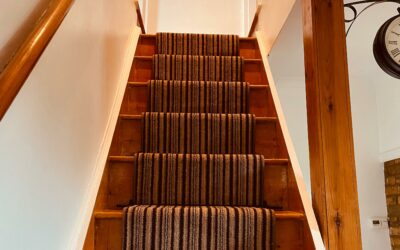
Instructional for Stair runner fitting to a “U” shaped landing.
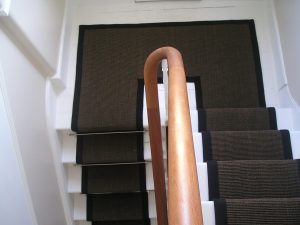
Many homes have a half landing between two flights of stairs. If you have this layout, you may like your stairs to look like the picture above. Look daunting? Read on to find out how easy it is!
In years gone by stair runner carpets were always fitted by professional carpet fitters. Layouts like the above, were achieved by complex mitering techniques that took years to learn. The fitting charge was extremely high. Not anymore!
To provide our clients access to a professional finish, without the need for complex miters, we offer a ready made section, pre edged which perfectly fits your half landing. Not only does this negate expensive fitting fees, but it’s stronger and can be fitted as soon as its delivered.
Time allowed for Stair runner fitting to a “U” shaped landing.
3 hours as a first time D.I.Y. job including studying the tutorial .
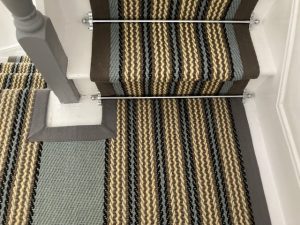
Target outcome
Step 1.
We recommend you read this entire tutorial including links in order to get a feel for the job before starting .
Step 2.
If you simply want us to make the U shape for you, and intend to employ a fitter, proceed directly to step 4.
If you are fitting the complete stair runner job yourself, the first action step is to fit the straight stairs above and below the half landing .Here is a link explaining how to fit the straight stairs
We recomend fitting the straight stairs first because it provides an exact target for the U shape .This removes any risk of making a measuring error.
Step 3.
Observe the picture and note that the stair carpet will be joined twice to the half landing .
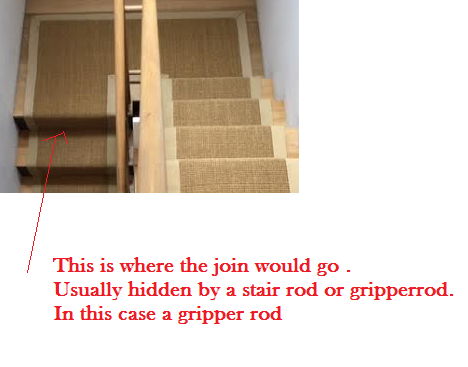
Once above the half landing and once below . These joins between the stairs and the half landing will be hidden under the two stair rods nearest to it . You can only see one in the picture above . Below is an example of a stair rod covering a join, albeit in a different layout . The advantage of using stair rods is that the you can cover the join with a stair rod. This is ideal for a DIY fitting because even if the join is untidy, you have around 17 mm of cover for it. Joining is easy, we will deal with that process later in this instructional .
Step 4.
This step is optional but will build your confidence , knowledge and vision prior to stair runners cutting later .
Assuming you have now fitted your straight stairs , use your straight edge and pencil to draw your target shape for the landing . This will be entirely obvious , but why not get a second opinion from your partner to put your mind at ease .
Time for a choice
Once you have fitted the straight stairs on either side of the U shape there is a fork in the road. You have two options. Option 1 is sending us a diagram. Option 2 is cutting on site. Option 1 will suit people more confidant with a tape measure and a pencil in their hands. Option 2 will suit people who prefer to use a knife.
Option 1(using a diagram)
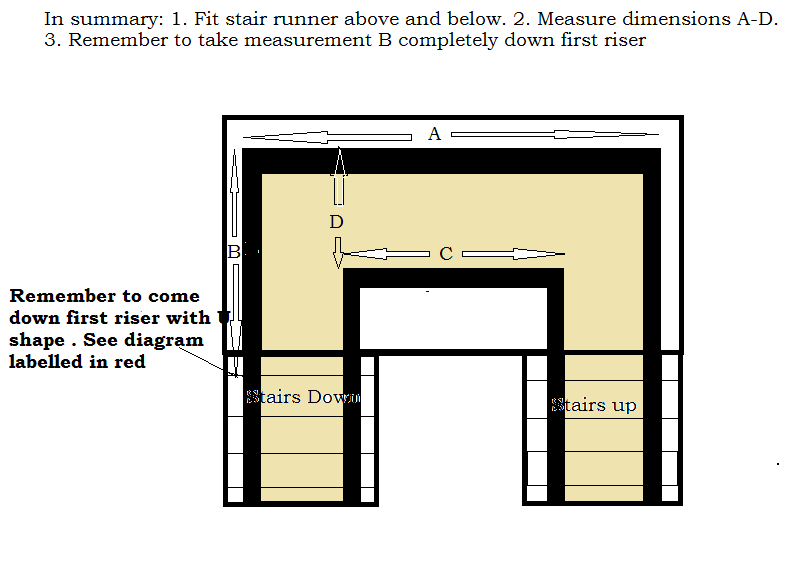
If you have chosen option 1 follow the diagram below. Clearly mark measurements A-D. plus the width of your runner which you should check measure as they can vary slightly.
If you have followed option 1 please now jump ahead to step 8 . If not please move to step 5.
Step 5.
You will have received a piece of border less material to complete your ‘u’ shape . This piece will be too big which is fine . Position that piece of material on the half landing . Ensure the pile direction is consistent with the stair runners . Ensure that the material is straight to the walls and in line position so that the material is overlapping the pencil marks you drew . Use tacks or staple gun to lightly staple the edges of the piece to the floor . This ensures it does not move when you come to the cutting part. These staples will be removed later so use sparingly .
Step 6.
Here comes the cutting part ! Take your straight edge and knife and cut to the required shape . The parts adjoining the stairs can be left long . Remember the great part is that even if the edge is not perfect it won’t matter . We will be attaching the border professionally to cover the edge . Your work will not be seen .
Step 7.
Send to us for edging . Please ask for our special address for bespoke edging .
Step 8.
Your finished piece will be sent back to you .
Step 9.
The final fitting is easy . Position the landing in line with your pencil marks and hold it down with a couple of staples and some spray glue .
Step 10.
Join to the stair carpet at the point where the stair rods will go . Simply cut the two ends so they slightly overlap each other and staple together with plenty of staples . Cover the join with a stair rod .
Sit back and admire your work and the knowledge you have gained of how to fit stair runners .

